Real-time Collaboration in video editing
A case study exploring how students collaborate on video editing

The problem
The video editor doesn’t support collaboration
When working on team video projects, since we didn’t support real-time collaboration, students had to figure out their own workarounds. Therefore, we aimed to help a group of students contribute to video-creation in real-time?
The challenges for real-time collaboration are technical constraints and diverse ways students collaborate.
MY ROLE
Lead product designer
I was driving the product design for this project end-to-end. I played a key role in defining visions, ideation, feature design, user testing, quality of the project, and communication between partner teams and users.
TIME
Nov 2019 - Feb 2020
TEAM
2 Product Designer, 1 Product Manager, and 6 Software Engineers.
As a result, 15% of teachers as beta testers converted to the new product through a “what’s new” popup that introduced Collaboration. 24% collaborative projects were created since March 2020. 🎉🎉
KICKOFF & DISCOVERY
At the outset of the project, I worked with the PM to set a few missions for the collaboration experience, after collecting user needs through observation and online interviews.
Key insights
Collaboration workshop & vision
I hosted a few brainstorming sessions with stakeholders to collect thoughts from different perspectives. Then I bumped some initial ideas at a vision level.
SOLUTIONS
A feature that enables students to work in the same editor in real-time
Even though it’s challenging to make real-time collaboration happen due to the technical complexity, my solution made collaboration approachable and intuitive, by allowing students to work in the editor with split roles and be able to switch roles. The goal is to facilitate team assignments and offer students various chances to learn and contribute, depending on their responsibilities.
Students choose however they want to contribute
I made assumption that students can stay in one editor. Although there can only be one editor role, the viewers can prepare media and watch the progress. In order to allow everyone to be able to edit, I explored splitted editors that were contained in the same place.

Share the equal ownership
It’s essential to team success that no one owns a particular part — students can take over the editing role in each tab. I led the design for role switching flow that offered students equal ownership and best ensured their chances to practice.
Combine the work as one piece
I explored ways that helped a team of students turn in their work as one piece. My design solved the problem that students required flexibilities to choose and rearrange parts.
Once each student committed their own part, one student just chose the tabs they want to include in the submission and rearrange the order.
The flow that combined two out of three edits, and the view of the combined edit.
HOW I GOT THERE
Closing the gap between fake collaboration and real collaboration
Three primary questions informed my design strategy:
How would teachers and students handle collaborative video projects in an ideal situation?
How might we support each of their approaches?
How might we provide what they need, in order to close the gap?
What does the ideal collaboration in video editing looks like?
Before I started to solve any problems, I wanted to make sure I was designing for collaborative assignments in different grade levels and various types of assignments. Our PM helped me reach out to 40 teachers with further questions I defined in a survey.
I learned that there’re 3 major approaches for students to split roles on team assignments: (1) work on one piece of video with a mix of responsibilities; (2) by sequential parts, e.g. introduction, conclusion, etc; (3) by editing roles, e.g. motion titles, audios, etc. I visualized the user journey, in order to surface key moments for solving the biggest piece in the puzzle: how might we design a flow that facilitates different types of collaborative approaches.

visualizing 3 use cases for different collaborative approaches in a video assignment
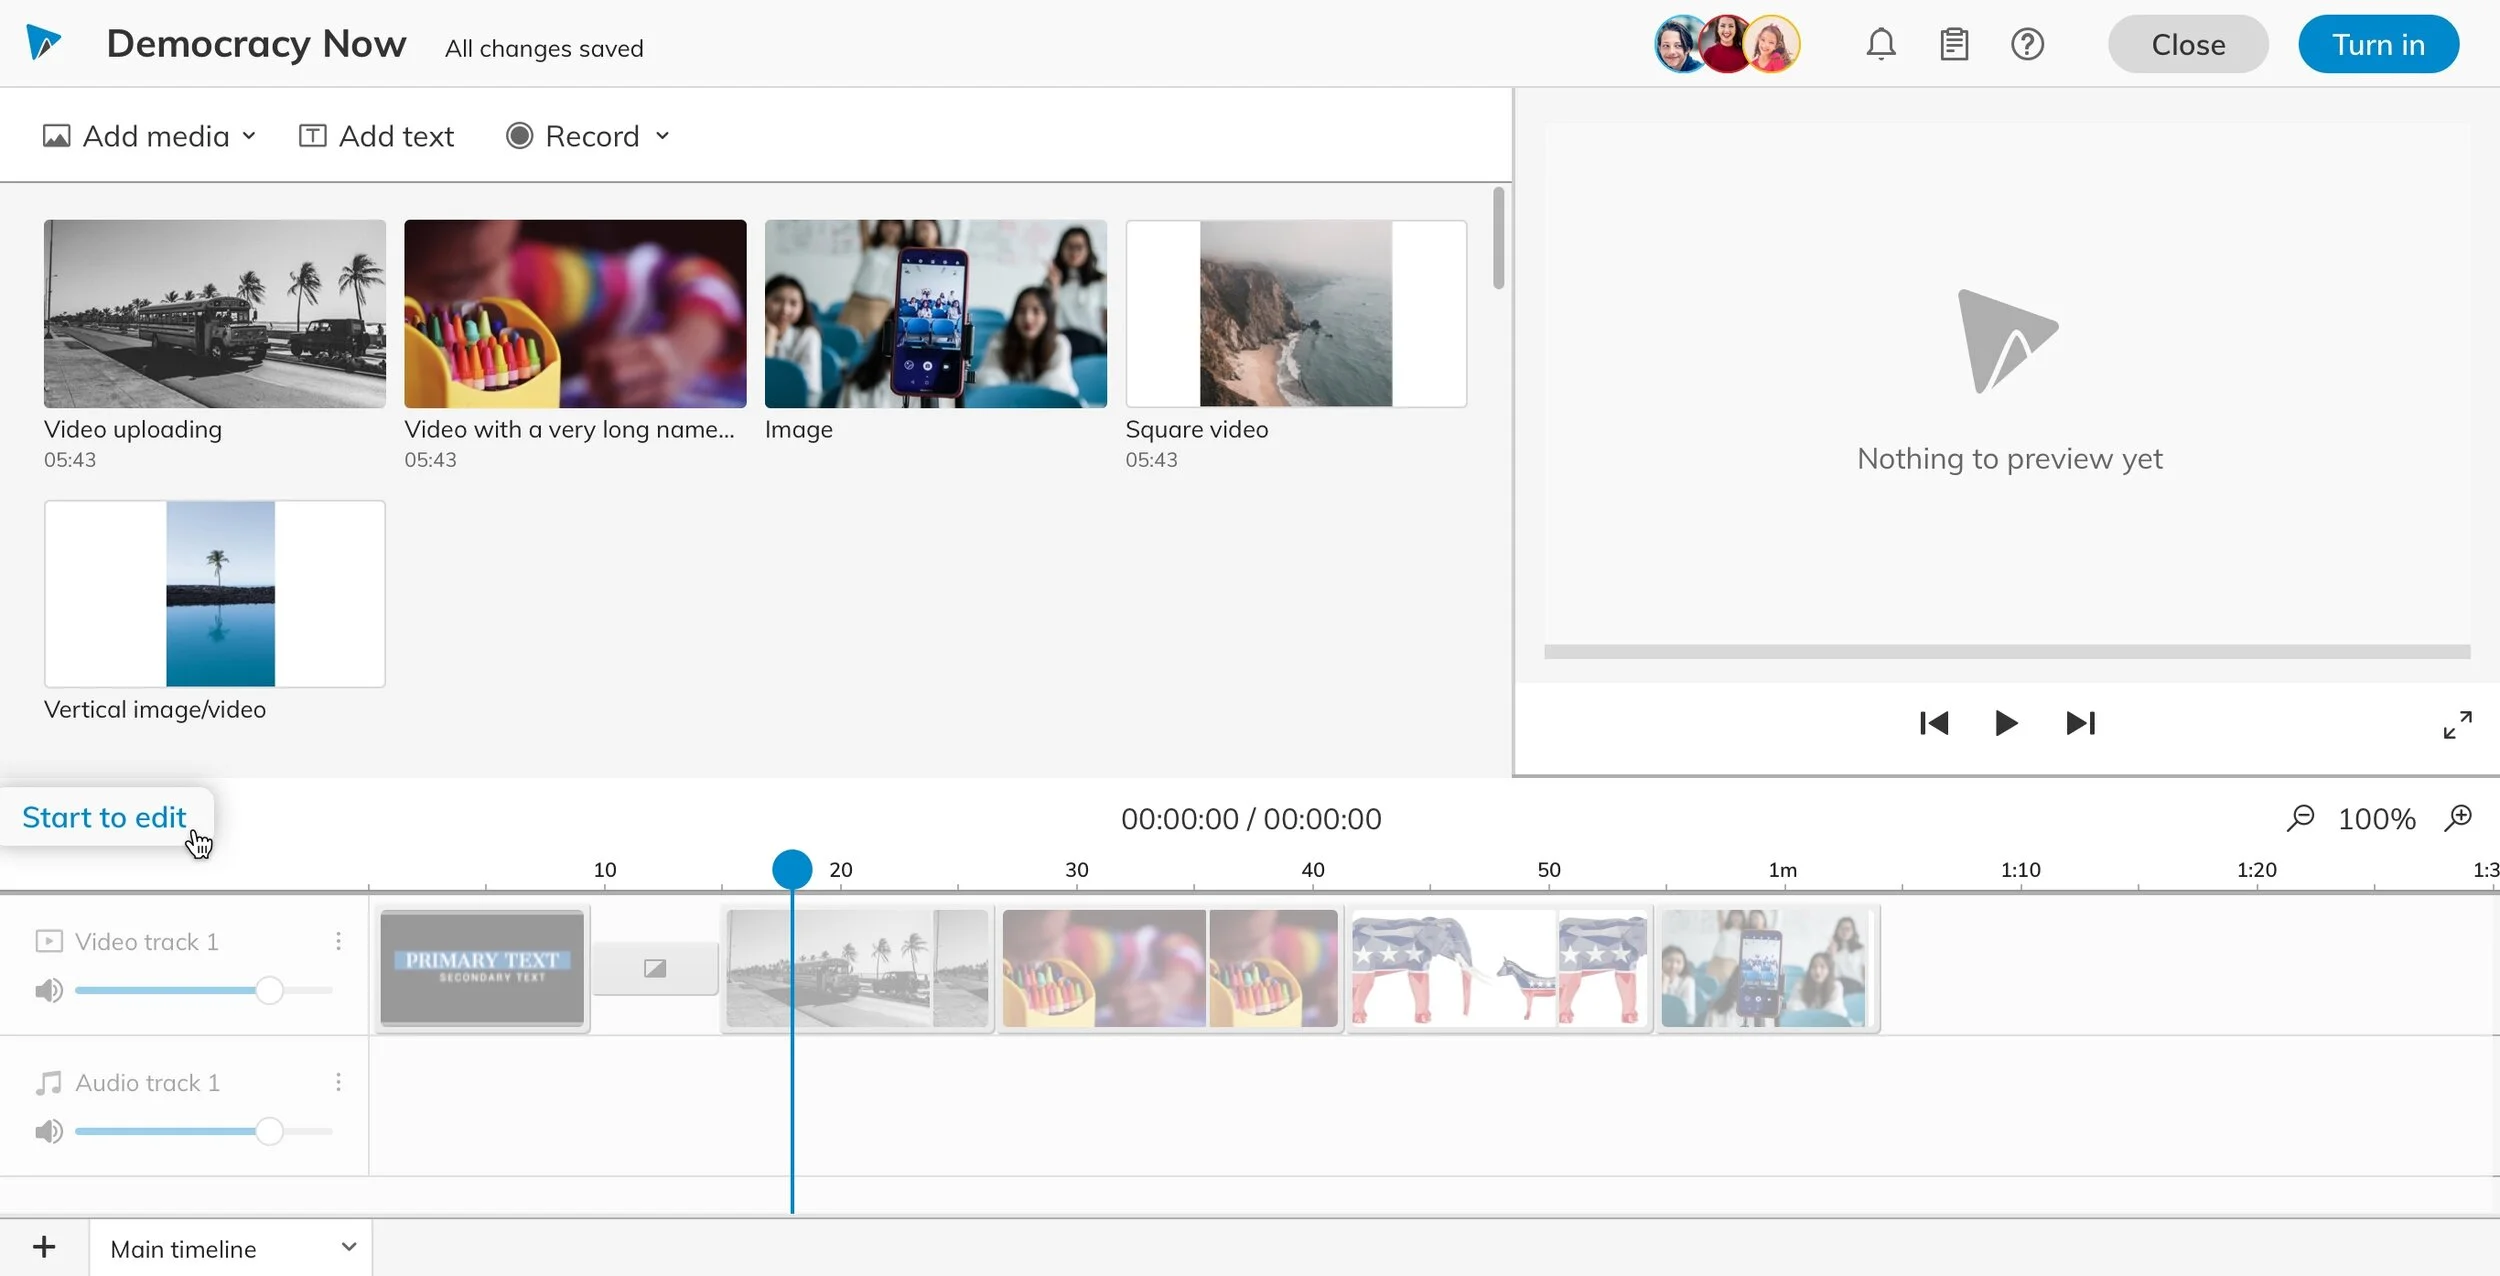
Allowing multiple students to work in one editor
Since we can only have one person editing in the editor, students have to work in separate editors. In order to give them transparency, the assumptions I made was: students are able to work “side by side” and view each other’s work in different editors, and combine them at the end. Inspired by Excel sheets, I thought tabs was closest thing to multiple editors “side by side”. To make this assumption work for real use cases, I made some rules and applied this modal to use cases to validate my assumptions.
Making rules based on the assumption:
A team of students can create as many tabs as they need, and combine them at the end;
The student who created a new tab is the main editor;
The student as a viewer can take over and claim to be the editor;
The student as a viewer should be able to watch the progress, preview the video, and contribute to the media bin.


The rules I made required to divid the editor space to a few parts for different level of accessibility, based on their roles. The design offered students enough transparency, and allowed them to access and contribute as much as possible in the same editor.

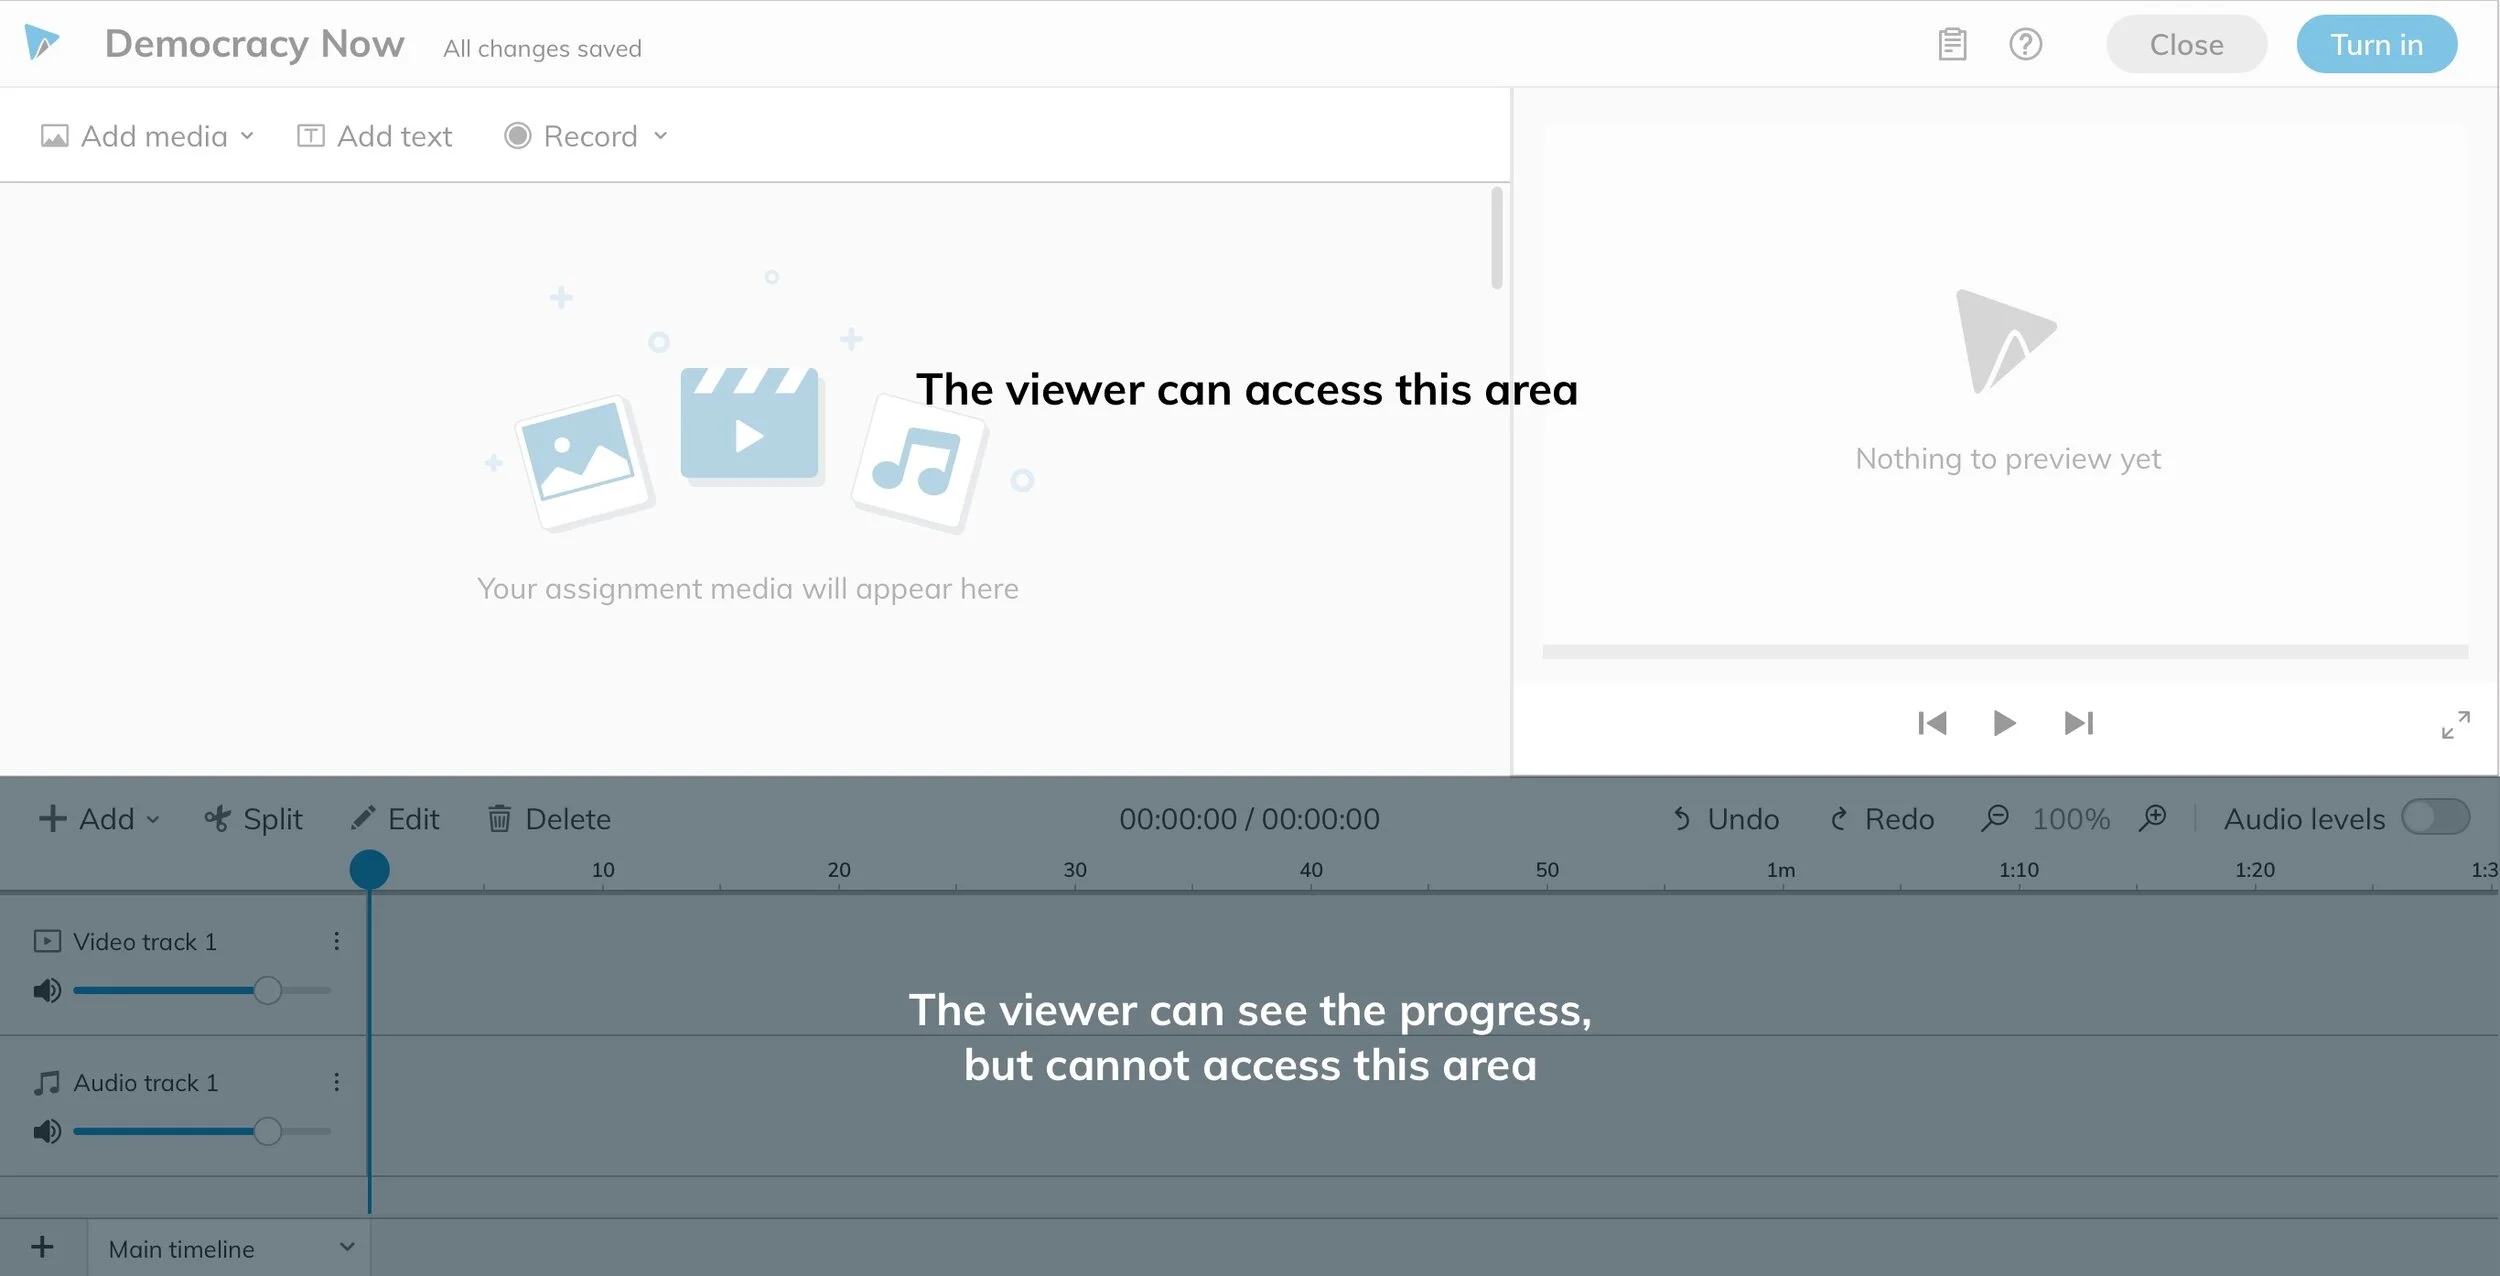
Visualizing the accessible area for viewers


Exploration: the representation that someone is editing the video
Bring students closer
By having students working in different editors with maximum transparency, I felt that students were still working separately. One of the most important decision I made was to break the wall — allowing students who were viewers to take over the editor role. Therefore all the students could make edits in all the editor tabs.
How might we allow students as viewers to take over the editor role?
As an essential concept for collaboration, everyone should share the same ownership to all the pieces of work. I explored when the viewer should request to take over versus when they should just claim to be an editor. At the same time, I wanted to encourage the editor to respond to the request as soon as possible but not being interrupted if the editor was in the middle of something.
![[UX directions] Top: The viewer needs to request; Middle: No request; Bottom: The viewer needs to request, and there’s also an option for the editor to switch as a viewer.](https://images.squarespace-cdn.com/content/v1/58e13ab1ebbd1a7ec6434f67/1585291203679-36MSVOUV7OY487VY03GC/take+over.png)
[UX directions] Top: The viewer needs to request; Middle: No request; Bottom: The viewer needs to request, and there’s also an option for the editor to switch as a viewer.
Closing the gap
It’s getting close to real-time collaboration, when students were able to view and edit in all the editors. However, the work created by the team is contained in separate editors. I explored ways to allow students to be able to combine specific parts or all the work to one piece.
How might we allow students to combine work?
The challenge was to make something that controls multiple tabs feel natural to use.

Got inspired by other products that had a “combine” feature

Options / variations of collaboration models
Version 1 was a game changer for me, although all the versions allowed students to select tabs, choose the order, and combine tabs. Version 1 allowed students to see clips from different tabs were grouped after combining them, and students could move the group not only horizontally, but also vertically, which solved the problem that students needed to arrange clips by video/audio tracks. I combined v1 with v3, because the selection area in v3 was closer to where the tabs existed.
Then I explored three interactions to help students understand the flow:

Version 1: make selection on the bottom tab bar

Version 2: Select tabs to combine on the bottom panel, and make the order right away

Version 3: Select tabs to combine on the bottom panel, and click “Continue” to make the order
I ended up with the 3rd version, because showing the thumbnails could inform the student which tabs would be combined, and there’s a bigger selection area. Among v2 and v3, showing titles on the bottom (v3) made more sense to me, especially after the thumbnails were reshuffled.
Edge cases
I formed my habit to always consider edge cases after solving the major problems. For example, what if the person who sent the takeover request but the previous editor is not at his laptop for a while. Or what happens if two viewers sent requests at the same time.

Future work
We identified further needs during the research stage. However, as part of the vision meeting with PM and stakeholders, we decided to design for those problems as version 2 features.
Students need to be able to collaborate with other students in their school, even if they aren't in the same class.
Teachers should be able to create pre-assigned teams within their classes.
Students working in teams should be able to communicate with others.
Teachers need to be able to collaborate with other teachers in managing their classes.
My Learnings
Having a principle(s) to guide design strategies makes the process smooth and consistent with the goal. I formed a principle based on the user study, which served as a high-level solution. It helped me think through specific use cases and keep all the features easily aligning with the goals.
I learned how fun design truly is. And it’s important to get people excited about my ideas. I enjoyed the process because we worked with our users together. My micro-interactions delighted my team and users, so they were supportive of my ideas.